上手实现一个微型配置中心动态自动更新配置

  为什么要实现一个配置中心呢?

  需求背景是组内的很多项目,尤其前后端分离的项目,由于前端项目打包是采用的hash的方式,打包的app.js或者css文件是带有hash值的,之前一直是每次前端有更新,就打包后将新的hash值更新到后端的application.properties中,而后端项目每次更新就得重新发布,一连串影响结果就是每次前端更新却连累后端也得重新发布,这是有点畸形的,前后端的耦合过重。

  在这样一个背景下,长痛不如短痛,于是想到使用类似配置中心的方式来管理这些前端资源的hash版本号,而如果因此就引入ApolloSpringCloudConfig这种专业的配置中心又过于笨重。考虑到本身我们RMS统一平台就维护有所有产品线子系统信息,可以在此基础上,维护一份配置项信息,与各自的子系统关联,RMS平台提供一个查询给RMS-SDK,RMS-SDK新增配置中心的功能,子系统通过SDK自动动态更新配置项的值,无需重启。

  虽说是一个微型的配置中心,但也分为server和client两部分。

server

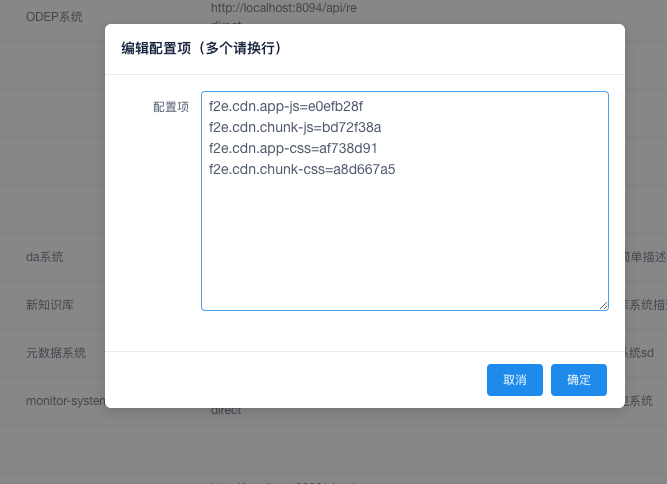
  server主要就是RMS平台,配置项数据的管理,以及持久化,server在内部管理数据的同时,对外提供一个查询的接口,主要用于SDK的查询。server端没什么好说的,就不放代码了,放张编辑配置项的图片意思一下:

WechatIMG2.png

client

  client即指子系统,子系统在引用了新SDK之后便具有了配置中心client的角色,配置项数据的更新等操作都是由SDK在底层自动完成,对子系统是无感知的。

  下面详细说下客户端 SDK的实现。

1.开启配置中心

  定义了一个注解@EnableRmsConfigCenter,在入口类或者@Configuration修饰的类上使用该注解开启配置中心,该注解Import了一个RmsConfigCenterRegistrar类,在RmsConfigCenterRegistrar中向Spring容器注册了两个bean定义(BeanDefinition):

1
2
3
4
5
6
7
8
9
10
11
12
13
14
15
16
17
18
19
20
21
@Retention(RetentionPolicy.RUNTIME)
@Target(ElementType.TYPE)
@Documented
@Import(RmsConfigCenterRegistrar.class)
public @interface EnableRmsConfigCenter {

String type() default "http";
}


public class RmsConfigCenterRegistrar implements ImportBeanDefinitionRegistrar {
@Override
public void registerBeanDefinitions(AnnotationMetadata importingClassMetadata,
BeanDefinitionRegistry registry) {
BeanRegistrationUtil.registerBeanDefinitionIfNotExists(registry,
SelfDefConfigProcessor.class.getName(), SelfDefConfigProcessor.class);

BeanRegistrationUtil.registerBeanDefinitionIfNotExists(registry,
PropertySourceProcessor.class.getName(), PropertySourceProcessor.class);
}
}

  @EnableRmsConfigCenter中的type用于指定获取配置中心数据的方式,默认以http轮询,也可以指定redis从rms平台的redis中获取。

  RmsConfigCenterRegistrar注册了两个bean定义,后面将一一说明。

2.SelfDefConfigProcessor记录使用@Value注解的类、字段

先看下SelfDefConfigProcessor的代码:

1
2
3
4
5
6
7
8
9
10
11
12
13
14
15
16
17
18
19
20
21
22
23
24
25
26
27
28
29
30
31
32
33
34
35
36
37
38
39
40
41
42
43
44
public class SelfDefConfigProcessor implements BeanPostProcessor, BeanFactoryAware {

private BeanFactory beanFactory;

@Override
public Object postProcessAfterInitialization(Object bean, String beanName) throws BeansException {
return bean;
}

@Override
public Object postProcessBeforeInitialization(Object bean, String beanName) throws BeansException {
Class clazz = bean.getClass();
for (Field field : findAllField(clazz)) {
processField(bean, beanName, field);
}
return bean;
}

private void processField(Object bean, String beanName, Field field) {
Value value = field.getAnnotation(Value.class);
if (value == null) {
return;
}
String key = value.value();
SelfDefConfigValue selfDefConfigValue = new SelfDefConfigValue(key, beanName, field, bean);
SelfDefConfigValueRegistry.register(beanFactory, key, selfDefConfigValue);
}

@Override
public void setBeanFactory(BeanFactory beanFactory) throws BeansException {
this.beanFactory = beanFactory;
}

private List<Field> findAllField(Class clazz) {
final List<Field> fields = new LinkedList<>();
ReflectionUtils.doWithFields(clazz, new ReflectionUtils.FieldCallback() {
@Override
public void doWith(Field field) throws IllegalArgumentException, IllegalAccessException {
fields.add(field);
}
});
return fields;
}
}

  SelfDefConfigProcessor类实现了BeanPostProcessor接口,即Bean后处理器(BeanPostProcessor的bean会被Spring上下文检测到,并将其用于后面Bean的创建,例如在postProcessBeforeInitialization()方法中实现一些标记操作,在postProcessAfterInitialization()方法中实现一些包装操作),这里我们主要在postProcessBeforeInitialization()实现主要逻辑,解析每个Bean的字段,如果字段被@Value注解修饰,则将@Valuevalue值连同字段当前BeanBean的名称一起封装成SelfDefConfigValue类对象,并将其与其对应的BeanFactory关联存储在自定义的注册表SelfDefConfigValueRegistry中,在后面监听到配置更新时,我将从注册表中查找对应配置项所在的类和字段。

3.PropertySourceProcessor初始化配置项数据以及长轮询监听配置项数据变化

还是先看下代码:

1
2
3
4
5
6
7
8
9
10
11
12
13
14
15
16
17
18
19
20
21
22
23
24
25
26
27
28
29
30
31
32
33
34
public class PropertySourceProcessor implements EnvironmentAware, BeanFactoryPostProcessor {

PlatformBean platformBean;

private ConfigurableEnvironment environment;

@Override
public void postProcessBeanFactory(ConfigurableListableBeanFactory beanFactory) throws BeansException {
log.info(environment.getProperty("client-id"));
platformBean = (PlatformBean) beanFactory.getBean("platformBean");
log.info(platformBean.getClientId());
this.initPropertySources(beanFactory);
}

private void initPropertySources(ConfigurableListableBeanFactory beanFactory) {
if (environment.getPropertySources().contains(PropertySourcesConstants.RMS_PROPERTY_SOURCE_NAME)) {
return;
}
ConfigDataChangeListener listener = new ConfigDataChangeListener(
environment, beanFactory);
ConfigDataPropertySource configDataPropertySource =
new ConfigDataPropertySource(PropertySourcesConstants.RMS_PROPERTY_SOURCE_NAME,
PropertySourcesConstants.RMS_CONFIG_DATA_REPOSITORY_HTTP,
listener, platformBean);
ConfigDataPropertySourceFactory.addConfigDataPropertySource(configDataPropertySource);
environment.getPropertySources().addFirst(configDataPropertySource);
}


@Override
public void setEnvironment(Environment environment) {
this.environment = (ConfigurableEnvironment) environment;
}
}

  PropertySourceProcessor实现了BeanFactoryPostProcessor接口,实现了BeanFactoryPostProcessor接口的Bean也会被spring上下文自动检测到,在spring创建Bean之前应用,但BeanFactoryPostProcessorBeanPostProcessor不同,BeanFactoryPostProcessor不能和bean实例交互,只可以修改bean定义(BeanDefinition),BeanFactoryPostProcessor接口提供的postProcessBeanFactory()可用于修改spring上下文内部的bean factory。在我定义的PropertySourceProcessor中,在postProcessBeanFactory()方法,主要是为了在Bean实例化之前,获取到配置中心的配置项数据,并将这些数据设置到Spring的环境(Environment)中,用于后续bean实例化之后,Spring将Environment中的PropertySource注入到@Value修饰的变量中。

  这里通过实现Spring的PropertySource接口,自定义了ConfigDataPropertySource,在这里封装了初始第一次从server获取配置项,由于是扩展的PropertySource接口,所以可以设置到Spring的Environment中,Spring也自然可以通过getProperty()获取配置数据并注入到bean。

  同时ConfigDataPropertySource还开启了一个定时线程池,轮询配置中心server获取配置项,有更新时,则调用定义的监听器ConfigDataChangeListener,从之前写入的注册表SelfDefConfigValueRegistry中找到配置项对应的bean以及字段,通过反射修改字段值。

具体代码如下:

1
2
3
4
5
6
7
8
9
10
11
12
13
14
15
16
17
18
19
20
21
22
23
24
25
public class ConfigDataPropertySource extends PropertySource<Object> {

private ConfigDataRepository configDataRepository;

public ConfigDataPropertySource(String name,
String type,
ConfigDataChangeListener listener,
PlatformBean platformBean) {
super(name);
log.info("ConfigDataPropertySource init");
this.configDataRepository = "redis".equals(type)
? new RedisConfigDataRepository()
: new HttpConfigDataRepository(listener, platformBean);
}

@Nullable
@Override
public Object getProperty(String name) {
return configDataRepository.getPlatformConfigDataCache().getConfigurations().getProperty(name);
}

public void addChangeListener(ConfigDataChangeListener listener) {
configDataRepository.addChangeListener(listener);
}
}

获取、轮询数据以及监听数据进一步封装成了ConfigDataRepository,提供两种实现,即Redis读取和Http轮询:RedisConfigDataRepositoryHttpConfigDataRepository,这里只看Http即可。

1
2
3
4
5
6
7
8
9
10
11
12
13
14
15
16
17
18
19
20
21
22
23
24
25
26
27
28
29
30
31
32
33
34
35
36
37
38
39
40
41
42
43
44
45
46
47
48
49
50
51
52
53
54
55
56
57
58
59
60
61
62
63
64
65
66
67
68
69
70
71
72
73
74
75
76
77
78
79
80
81
82
83
84
85
86
87
88
89
90
public class HttpConfigDataRepository implements ConfigDataRepository {
private volatile AtomicReference<PlatformConfigDataCache> platformConfigDataCache;

private ConfigDataChangeListener listener;

private PlatformBean platformBean;

private final static ScheduledExecutorService executorService;

static {
executorService = Executors.newScheduledThreadPool(1, new ThreadFactory() {
@Override
public Thread newThread(Runnable r) {
Thread thread = new Thread(r, "Rms_Http_Config_Data_Repository_Thread-" + System.currentTimeMillis());
thread.setDaemon(true);
if (thread.getPriority() != Thread.NORM_PRIORITY) {
thread.setPriority(Thread.NORM_PRIORITY);
}
return thread;
}
});
}

public HttpConfigDataRepository(ConfigDataChangeListener listener, PlatformBean platformBean) {
this.platformConfigDataCache = new AtomicReference<>();
this.platformBean = platformBean;
this.addChangeListener(listener);
this.syncData();
this.scheduleRefreshData();
}

@Override
public synchronized void syncData() {
// 同步获取数据,如果变化就调用listener
RestTemplate restTemplate = new RestTemplate();
try {
String result = restTemplate.getForObject(platformBean.getConfigUrl() + "?clientId=" + platformBean.getClientId(),
String.class);
if (Objects.nonNull(result)) {
JSONObject jsonObject = JSONObject.parseObject(result);
log.info(jsonObject.toJSONString());
if (jsonObject.getBooleanValue("success")) {
Properties properties = ConfigDataUtil.trasformConfigData(
jsonObject.getJSONObject("results").getString("configs"));
PlatformConfigDataCache current =
new PlatformConfigDataCache();
current.setClientId(platformBean.getClientId());
current.setConfigurations(properties);
current.setLastUpdateTime(
jsonObject.getJSONObject("results").getLong("updateTime"));

PlatformConfigDataCache previous = this.platformConfigDataCache.get();
if (Objects.isNull(previous)) {
this.platformConfigDataCache.set(current);
log.debug("after set cache: {}", JSON.toJSONString(this.platformConfigDataCache.get()));
} else {
if (current.getLastUpdateTime() > previous.getLastUpdateTime()) {
this.platformConfigDataCache.set(current);
listener.onChange(current);
}
}
}
}
} catch (Exception e) {
log.error("获取配置数据失败", e);
}
}

@Override
public void scheduleRefreshData() {
// 周期性调用syncData()
executorService.scheduleAtFixedRate(new Runnable() {
@Override
public void run() {
log.info("start refresh config data");
syncData();
}
}, 20, 10, TimeUnit.SECONDS);
}

@Override
public void addChangeListener(ConfigDataChangeListener listener) {
this.listener = listener;
}

@Override
public PlatformConfigDataCache getPlatformConfigDataCache() {
return this.platformConfigDataCache.get();
}
}
1
2
3
4
5
6
7
8
9
10
11
12
13
14
15
16
17
18
19
20
21
22
23
24
25
26
27
28
29
30
31
32
33
34
35
36
37
38
@Slf4j
public class ConfigDataChangeListener {

private final Environment environment;

private final ConfigurableBeanFactory beanFactory;

public ConfigDataChangeListener(Environment environment, ConfigurableListableBeanFactory beanFactory) {
this.beanFactory = beanFactory;
this.environment = environment;
}

public void onChange(PlatformConfigDataCache newData) {
Properties properties = newData.getConfigurations();
Enumeration names = properties.propertyNames();
while (names.hasMoreElements()) {
String key = (String) names.nextElement();

List<SelfDefConfigValue> selfDefConfigValues =
SelfDefConfigValueRegistry.getRegistry()
.get(beanFactory)
.get(PropertySourcesConstants.RMS_CONFIG_PROPERTY_PREFIX
+ key
+ PropertySourcesConstants.RMS_CONFIG_PROPERTY_SUBFIX);
if (Objects.nonNull(selfDefConfigValues)) {
selfDefConfigValues.forEach(selfDefConfigValue -> {
try {
selfDefConfigValue.update(properties.getProperty(key));
} catch (IllegalAccessException e) {
log.error("更新 @value 失败, bean name: [{}], key: [{}]",
selfDefConfigValue.getBeanName(), selfDefConfigValue.getKey(), e);
}
});
}
}

}
}

  这样一个配置中心以及动态自动更新配置就实现了,
具体代码在 https://github.com/wetsion/study/tree/master/src/main/java/com/wetsion/study/self_def_config_center


写在后面的话。实现这样一个配置中心主要基于对Apollo(阿波罗)的学习。在有这样一个想法之后,在SpringCloudConfig和Apollo中选择了Apollo,通过学习它的源码,对自动更新原理有了较清晰的理解,也感叹别人的设计。当然我这样一个微型的配置中心也是有很多需要完善的地方,比如没有对namespace作区分处理,就会存在重名的问题,也就会发生冲突,所以后续完善过程中在轻量的同时,也要保证没有大问题。

秋月 wechat
欢迎您扫一扫上面的微信公众号,订阅我的博客!
随缘打赏,您的支持将鼓励我继续创作!